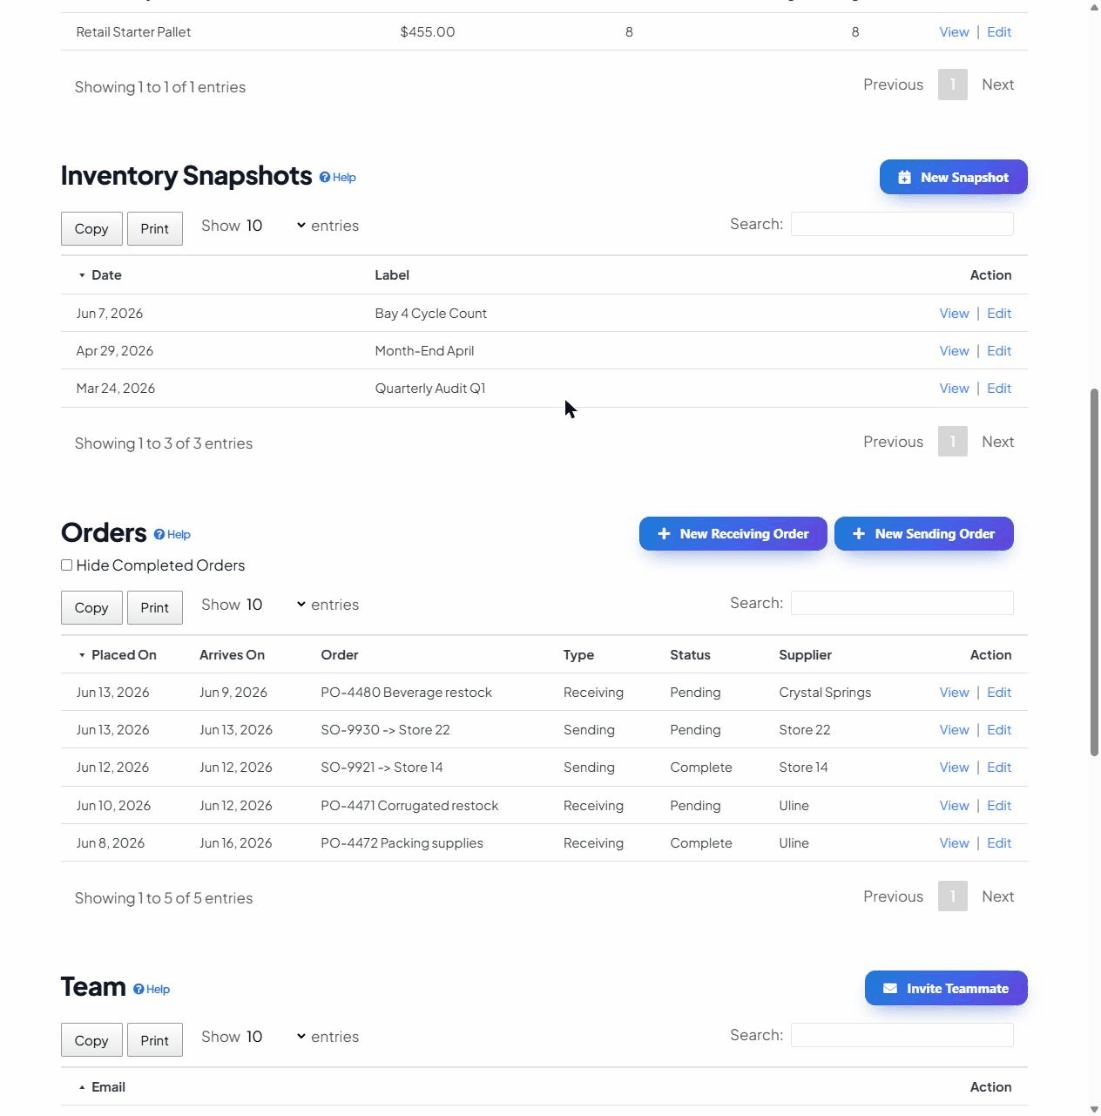
Orders
Orders track stock coming in and going out — with suppliers, invoices, costs and tracking links attached — and move your counts automatically when an order is completed, so you never double-enter.
Open your dashboardTwo kinds of order
- Inbound (Receiving) — stock you’ve ordered from a supplier and expect to arrive. While open, the items count toward your Receiving figures.
- Outbound (Sending) — stock going out to a customer or job.
You create each from its own button at the top of the Orders section: New Receiving Order or New Sending Order.
Creating an order
- Click the inbound or outbound new-order button.
- Give the order a Label (e.g. “Restock raisins”).
- Fill in any of the optional details: Placed On / Arrives On dates, Supplier, Invoice Reference, Shipment Tracking Link, Total Cost, and even a drag-and-drop Invoice file.
- Save, then open the order and add the line items it covers under Order Items — which inventory items, and how many of each.
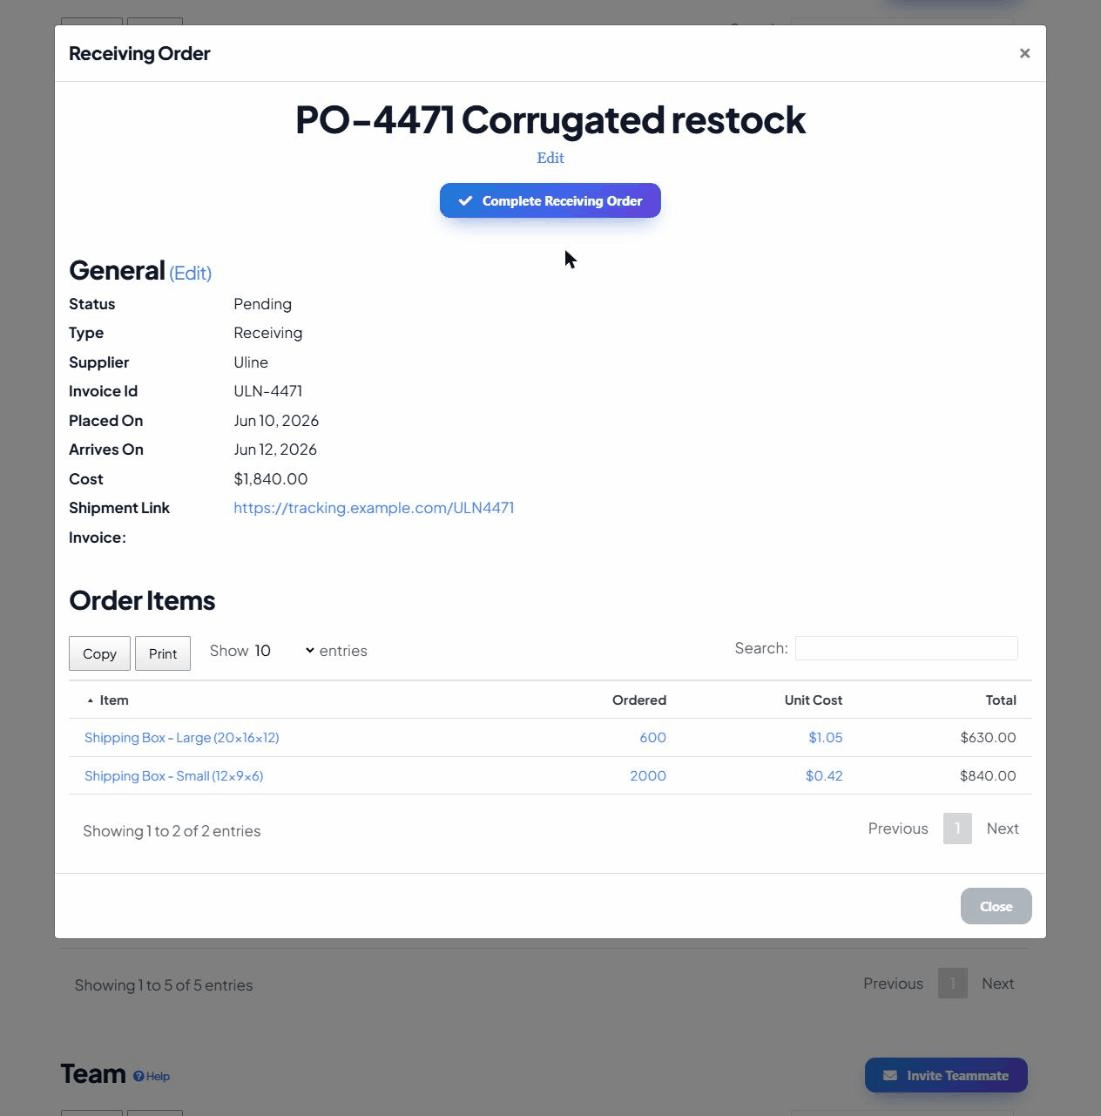
Completing an order — where the stock moves
An order stays Open until you mark it done. Open the order and click Complete … Order and the app applies its line items to your inventory:
- Completing an inbound order brings those items into Stock (they were counted as on-order before).
- Completing an outbound order removes them from stock as they ship.
This is the payoff: you log an order once, and when it lands you click complete instead
of re-typing quantities. The counts — and the “Including Receiving” figure your
assemblies rely on — stay correct on their own.
Finding orders
The Orders table shows the placed and arrival dates, label, type, status and supplier. Use the Hide Completed Orders checkbox to focus on what’s still open, and click any order to view its full detail, attached invoice and line items.
Tips
- Fill in Arrives On so you can see what’s due and when.
- Attach the invoice file and reference number to keep cost and provenance next to the stock.
- Add the Shipment Tracking Link so anyone on the team can check delivery status in one click.