Inventory
The Inventory section is the heart of the app — it’s the master list of everything you keep track of, with live counts, values and low-stock alerts for each item.
Open your dashboardWhat this section is for
Every physical thing you want to keep an eye on — products, parts, raw materials, tools, supplies — lives as an inventory item. Each item carries four running counts, a unit value, optional reorder links, a photo, notes, and its own QR code. Assemblies, Orders and Snapshots all build on top of these items, so this is usually the first section you set up.
The four counts on every item
Each item tracks four separate numbers so “how many do we have” never gets ambiguous:
- Stock — what you physically have on hand right now.
- Receiving — how many are on order and expected to arrive.
- Sending — how many are committed to go out / are in use.
- Damaged — how many are unusable and shouldn’t be counted as sellable stock.
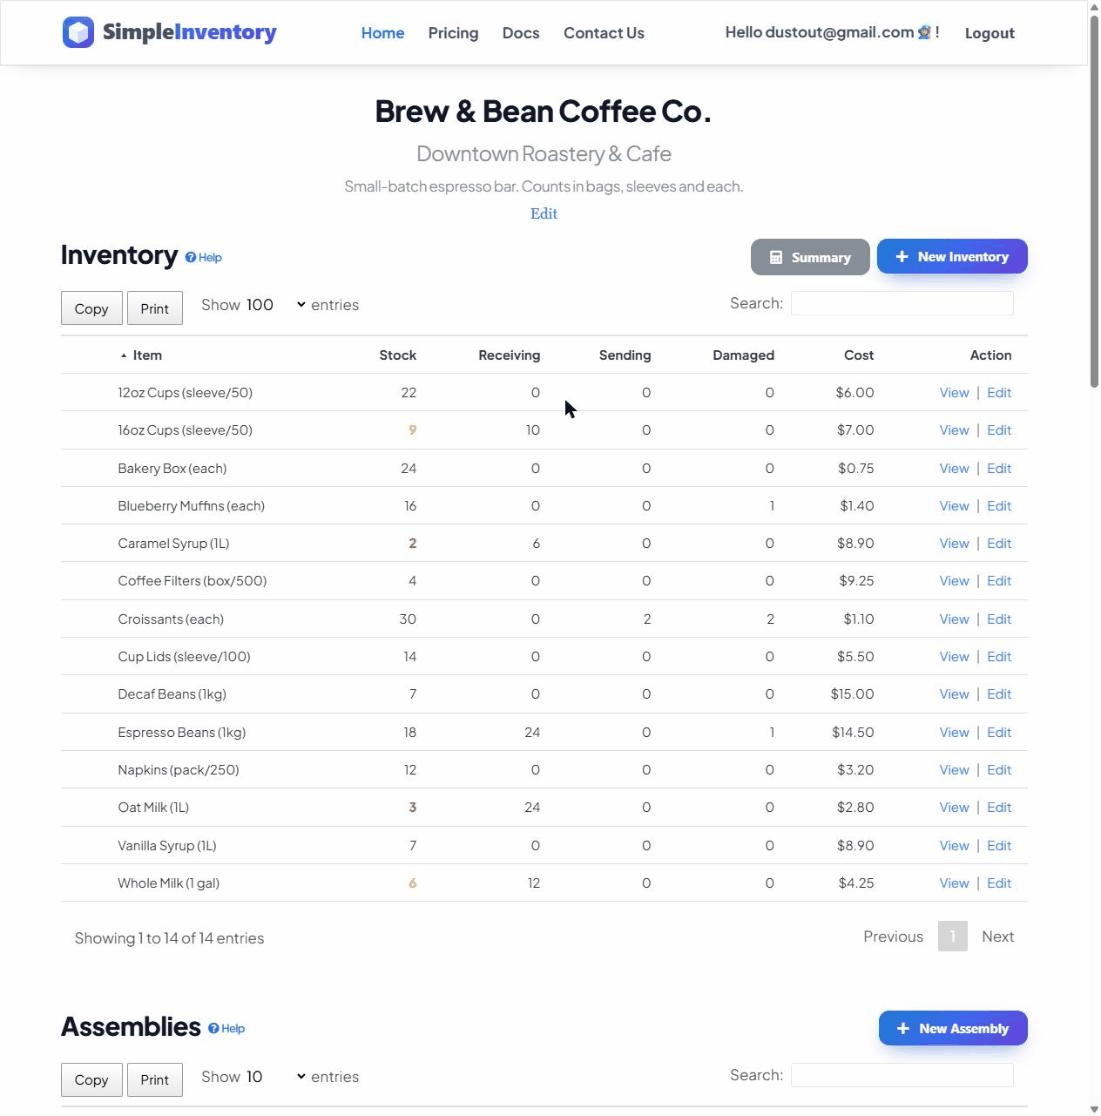
Adding an inventory item
- Click New Inventory at the top right of the Inventory section.
- Give it a name — whatever your team actually calls it.
- Set the Value (what one unit is worth). This is what the app uses to total up the worth of your stock.
- Optionally add a photo, an Order More Link (and a backup supplier link), and any notes.
- Set a Warning and Critical level if you want low-stock alerts (see below). Leave them at 0 to disable.
- Click Save.
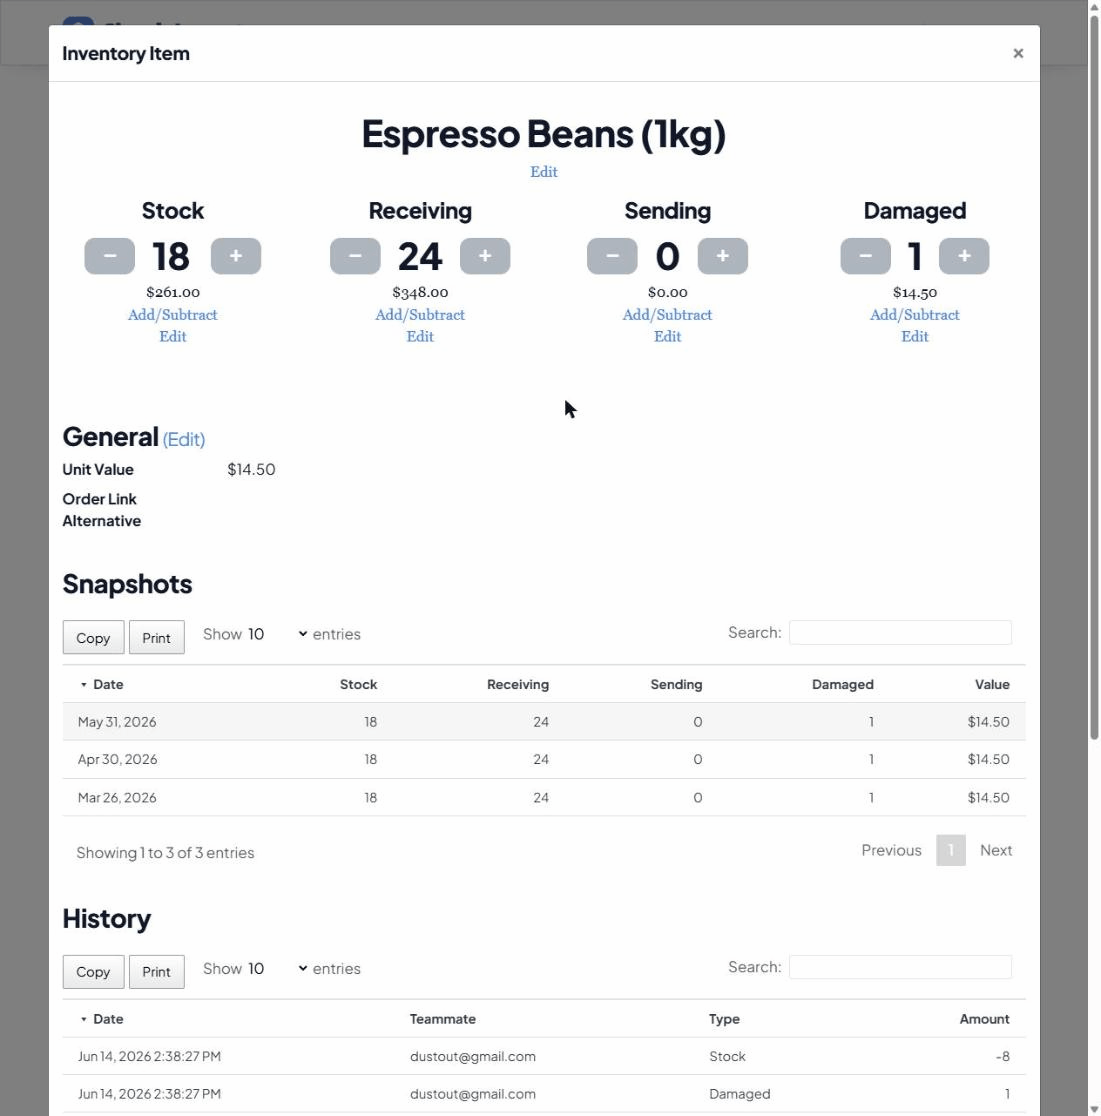
Changing counts
Click any item to open it, then use the controls under each of the four counts:
- The − / + buttons nudge a count by one.
- Add/Subtract opens a quick pad for larger jumps (±5, ±10, ±25, ±100) or any number you type.
- Edit sets the count to an exact value — handy after a physical recount.
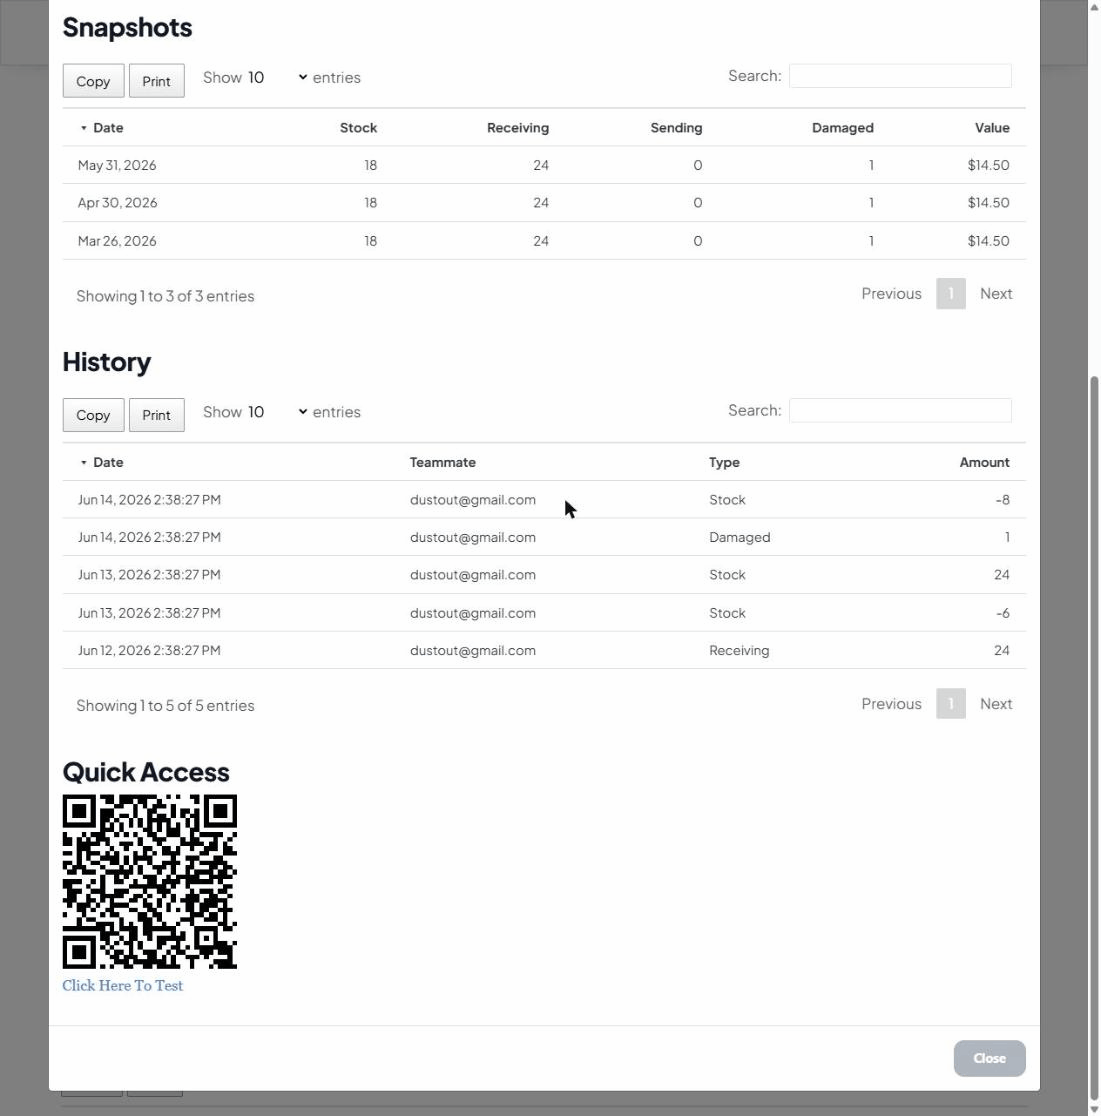
Every change is recorded in that item’s History, so you can always see who changed what and when.
Low-stock warnings
Set a Warning Inventory Level and the item’s stock number turns yellow once it drops to or below it. Set a Critical Inventory Level and it turns red. This makes it obvious at a glance which items need reordering. Set either to 0 to turn that alert off.
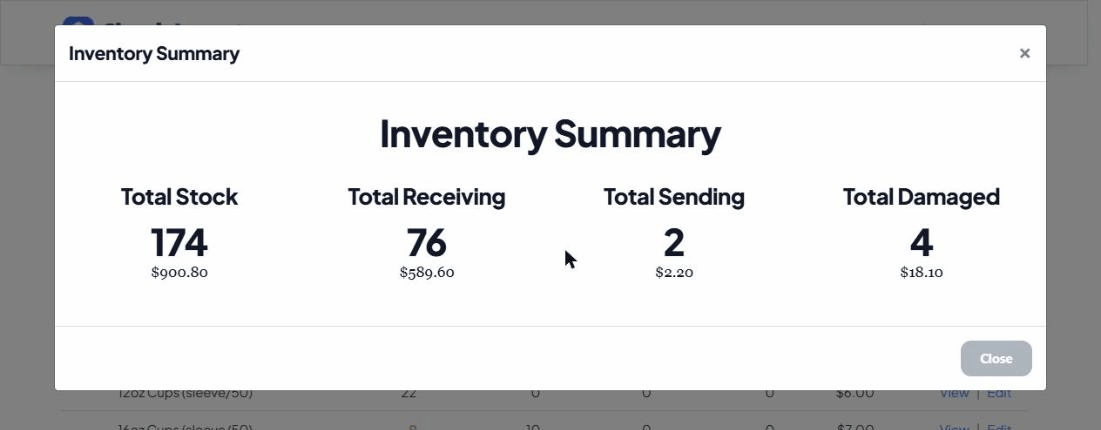
The Summary button
Summary (top right) opens a roll-up of your whole catalog — the total Stock, Receiving, Sending and Damaged counts across every item, with the dollar value of each. It’s the quickest way to see what your inventory is worth right now.
QR codes for quick access
Open any item and scroll to Quick Access for a printable QR code. Stick it on a shelf or bin, and anyone can scan it with a phone camera to jump straight to that item and update its count — no app to install.